Cross Stitch is a delightful and versatile craft that allows you to create beautiful designs with just a needle, thread and fabric. If you're new to cross stitching, this step by step guide will help you learn the essentials, from choosing materials to executing basic stitches. Let's start this journey together!
Materials You'll Need:
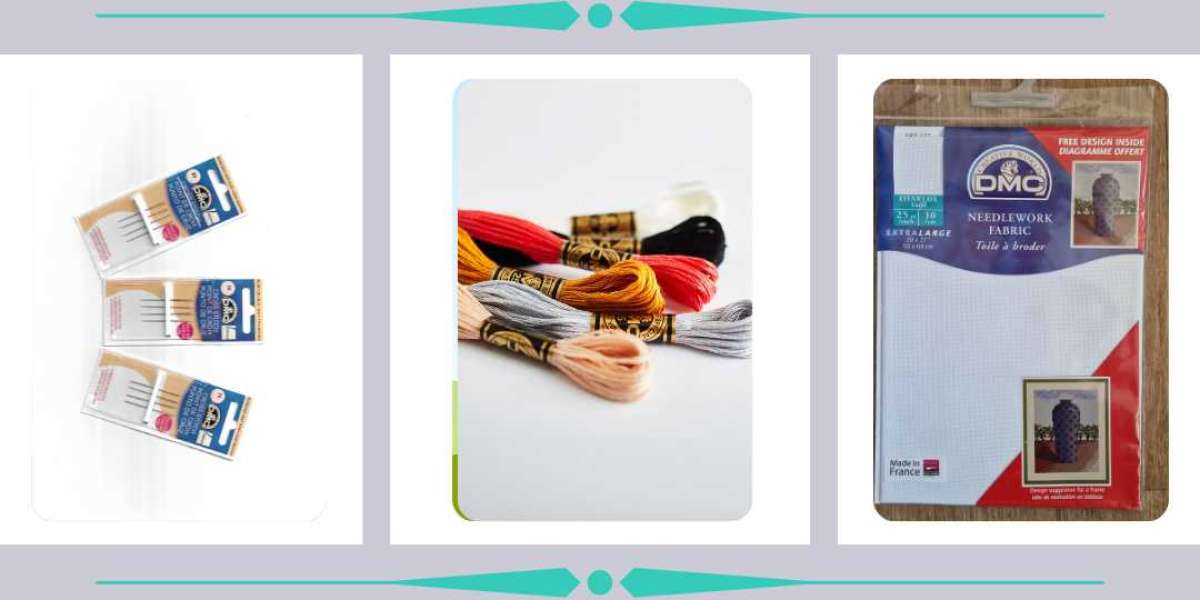
- Fabric: The best fabric to begin with is Aida. It is a popular choice for beginners due to it's clear weave. It's available in different counts but 14ct is ideal for beginners.
- Embroidery Thread: Cross Stitch is typically done with six stranded cotton embroidery thread. The most common used brand is DMC. There is a vast amount of colours for you to choose from.
- Tapestry Needles: These needles are blunt tipped and have a bigger eye to make threading the needle easier.
- Scissors: A good pair of embroidery scissors with fine points will come in handy when cutting thread.
- QSnap Frame: While not essential, a QSnap frame will hold your fabric in place with plastic clips and keeps your fabric taut when stitching on it.
Step 1: Preparing Your Fabric
If your fabric is from a kit, you may want to fold over the edge and use some thread to secure it down. this helps to prevent the fabric from fraying.
If you are kitting up a pattern you have brought, you need to work out what size fabric you need. You can do this by searching for a fabric calculator and typing in how many stitches high and wide the pattern is. Make sure to add on a border of at least 3 inches. This will tell you what size you need and you can either buy it pre-cut or cut some fabric you have to size. Again, you can then fold over the edges and use a tacking stitch to keep it place to stop fraying.
Step 2: Choosing a Pattern
When choosing a pattern, it is best to start small and simple. There are plenty of beginners patterns available. The patterns with not many colours tend to be on the easier side and are great to get you started with this amazing hobby.
Step 3: Understanding the Pattern
Each pattern has Symbols on it with a key. The symbols relate to a colour needed on the chart. The symbol in the square is the colour that stitch needs to be. To find out the colour, consult the key as it will provide the number for thread.
The grid lines are bold on the pattern are normally 10 stitches wide and 10 stitches high. These help you to work out where stitches need to go.
Step 4: Threading the Needle
First of all you need to cut the thread to a length you are comfortable with. Then separate 1 thread from the other 5. Fold the single strand in half and thread the 2 ends through the eye of the needle.
Step 5: Starting Your First Stitch
When starting the thread, I use the Loop Method. To do this, you need to go down in the bottom left hole, leaving the loop of the thread on the front of the fabric. Now bring the needle up the top right hole and pull it through the loop. Now go back down the top right hole. To complete the cross, bring the needle up through the bottom right hole and down through the top left hole. This is your first cross stitch complete.
Step 6: Continuing Your Stitches
You now keep making these crosses following the pattern in any way that makes sense to you. You need to make sure that you make your crosses all the same so it looks neater.
To change the thread to a different colour, you need to secure the current thread under a few stitches on the back of the fabric. Then start the new colour the same way as you started the first thread.
Step 7: Finishing Your Project
Once all the stitches have been completed, you can remove it from the frame you were using to stitch it. Now trim any excess thread off from the back of the project and finish either in a frame or as a small pillow or anyway you want. The possibilities are endless.




ZZNews 1 y
great article